Sew your own hanging pots, using scrap fabrics

I love a thrifty project! When I saw the post a few days ago, on the Stoff & Stil Instagram page, of hanging pots, I was really taken with the shape. Looking at my bag of fabrics from Bristol Scrapstore, it occurred to me that I could use the free pattern as my template and put my own twist on the design.
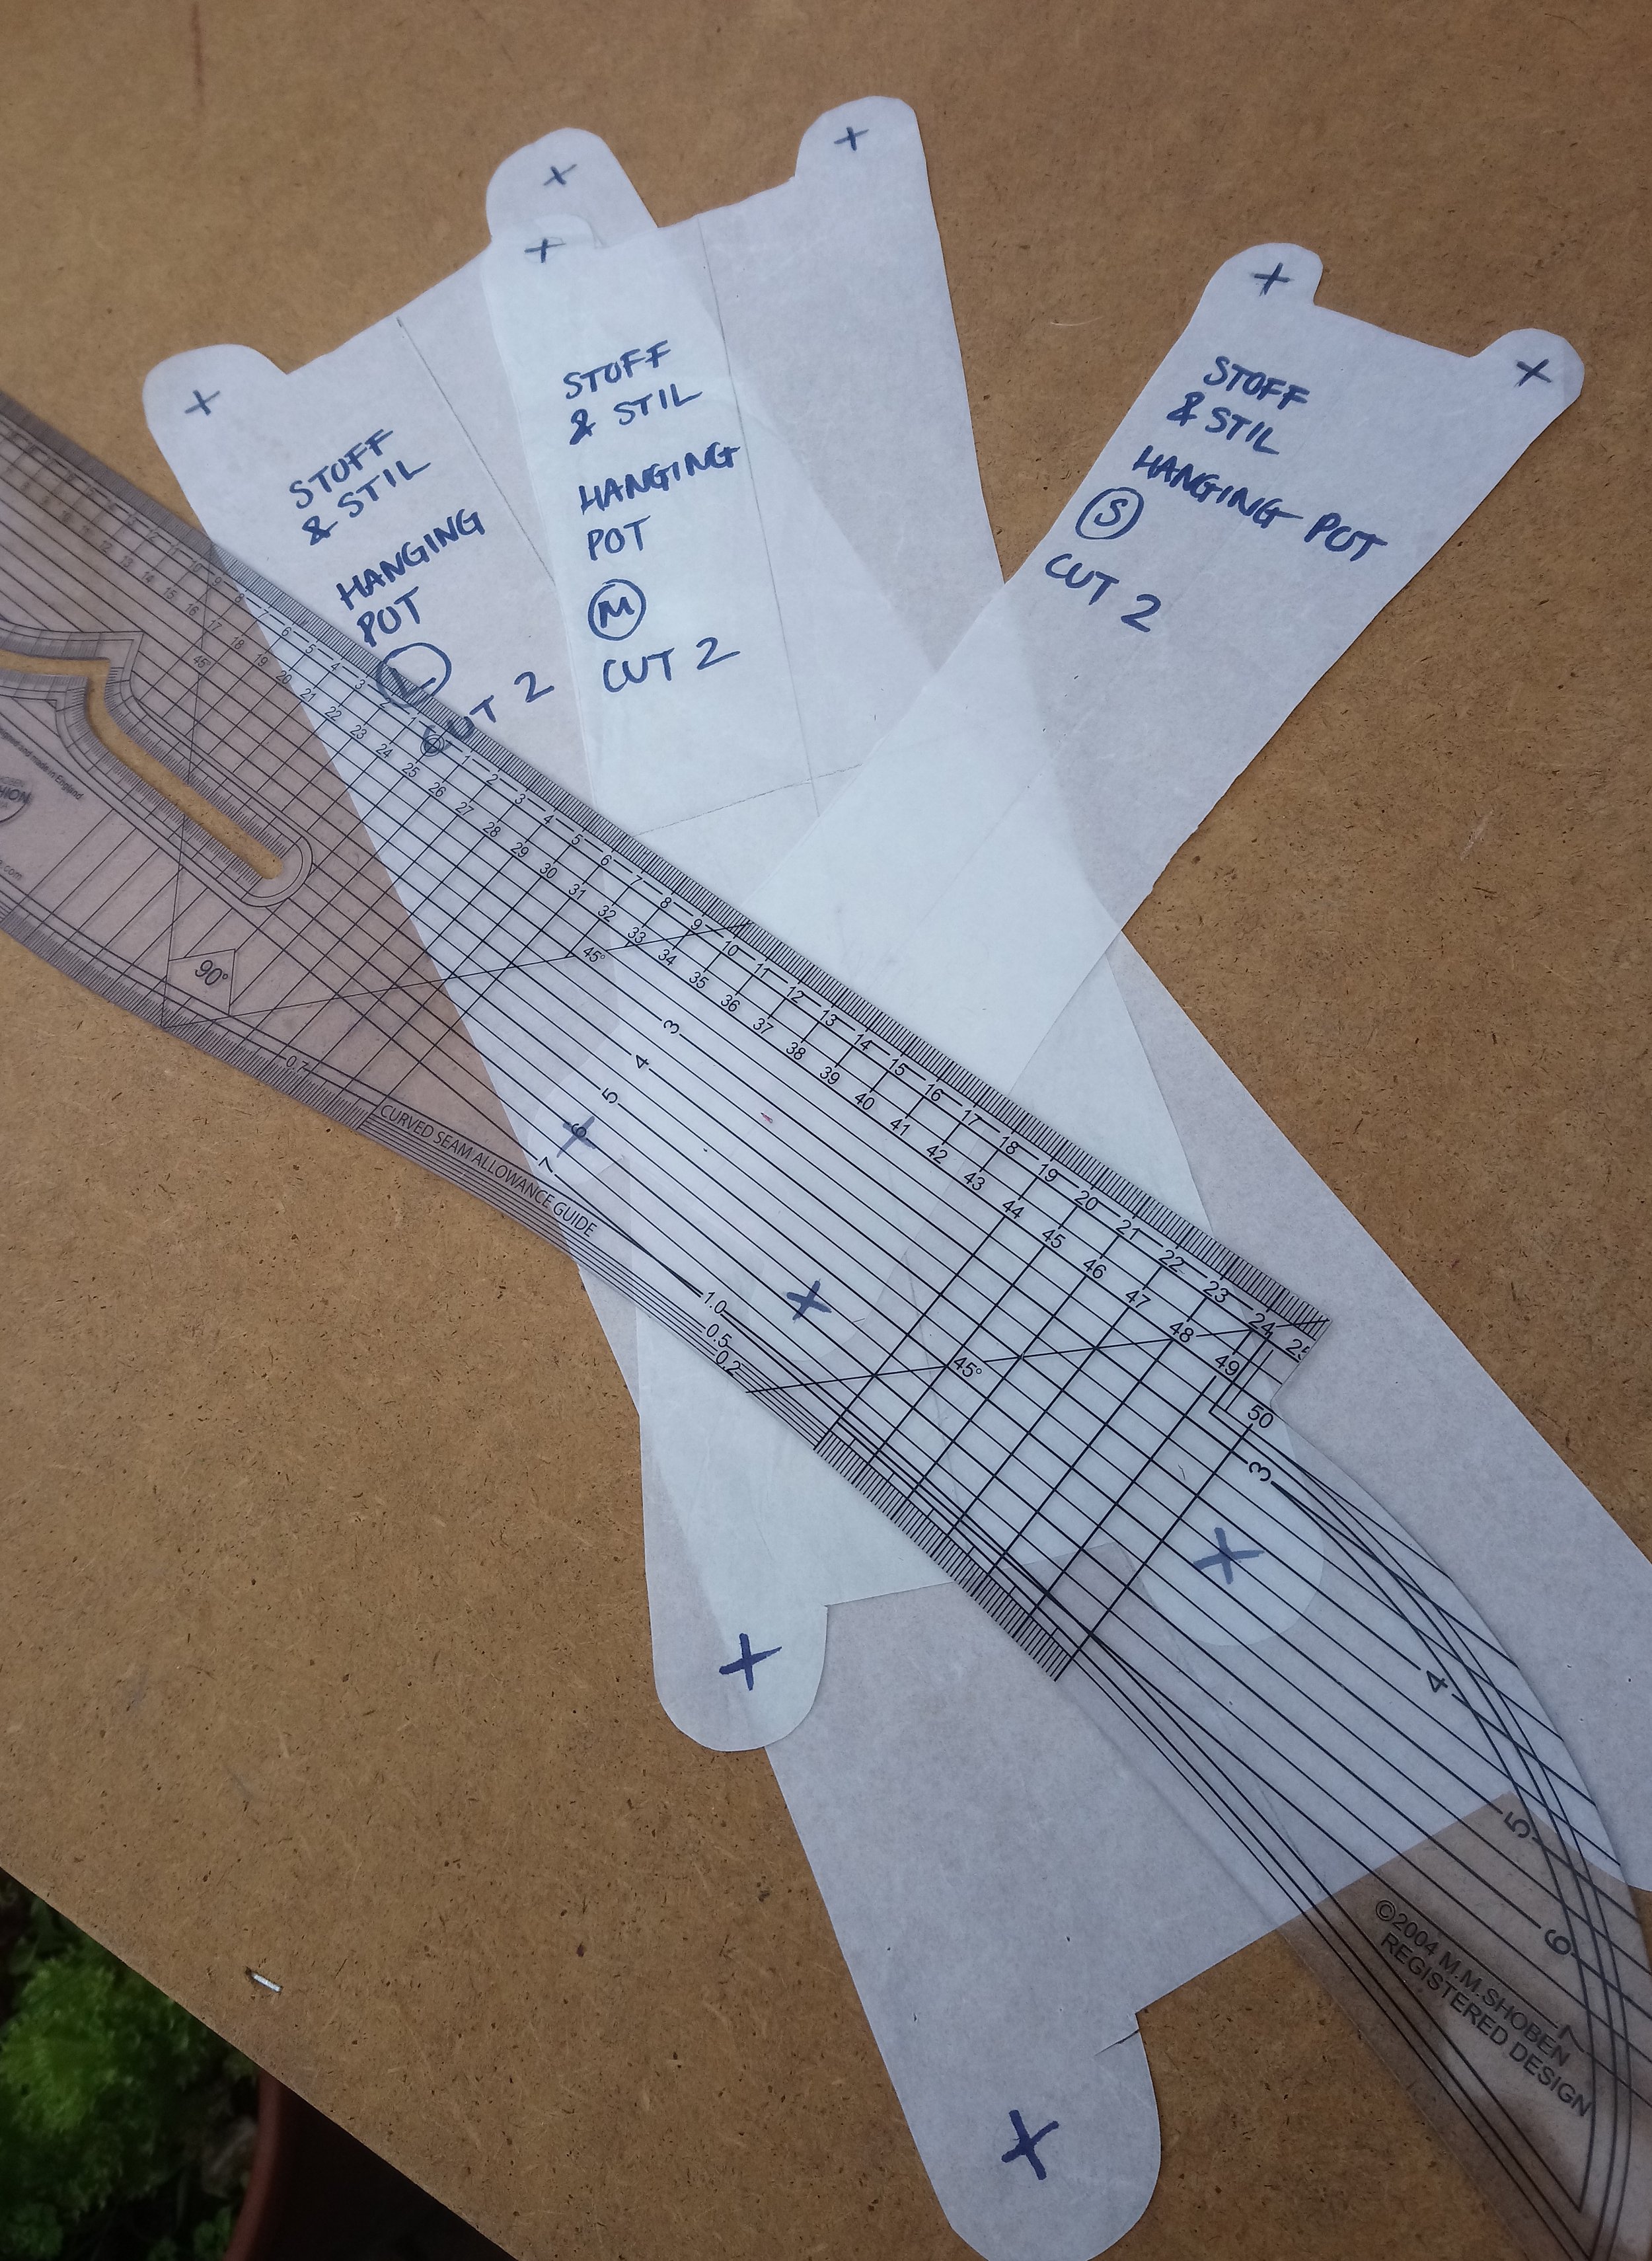
I've recently noticed how amazing the bark is on plane trees. It looks like a camouflage print made up of blob shapes. Taking inspiration from this bark pattern I set about cutting shapes from the scrap fabrics.The template is a FREE download. I'll put the link at the bottom of this page.
Step 1 - Using the templates, cut 2 rectangles for each pot, slightly larger than each template.
Backing piece cut larger than template
Step 2 - Cut a selection of abstract, blob shapes, in your chosen fabric.

Template placed over fabric
Step 3 - Using a long stitch length (4 is ideal), sew the shapes to the backing piece. Leaving areas to curl up gives the pot added texture. I also stitched in a few creases which I quite like. It's a fun, and, not exact, process. I approach this kind of project differently from garment construction, when I tend towards very accurate techniques. I suggest you enjoy the creative process of attaching the cut pieces to the backing on each piece until you feel you have enough on there.

Sewing the blob shapes of scrap fabrics onto the backing piece.
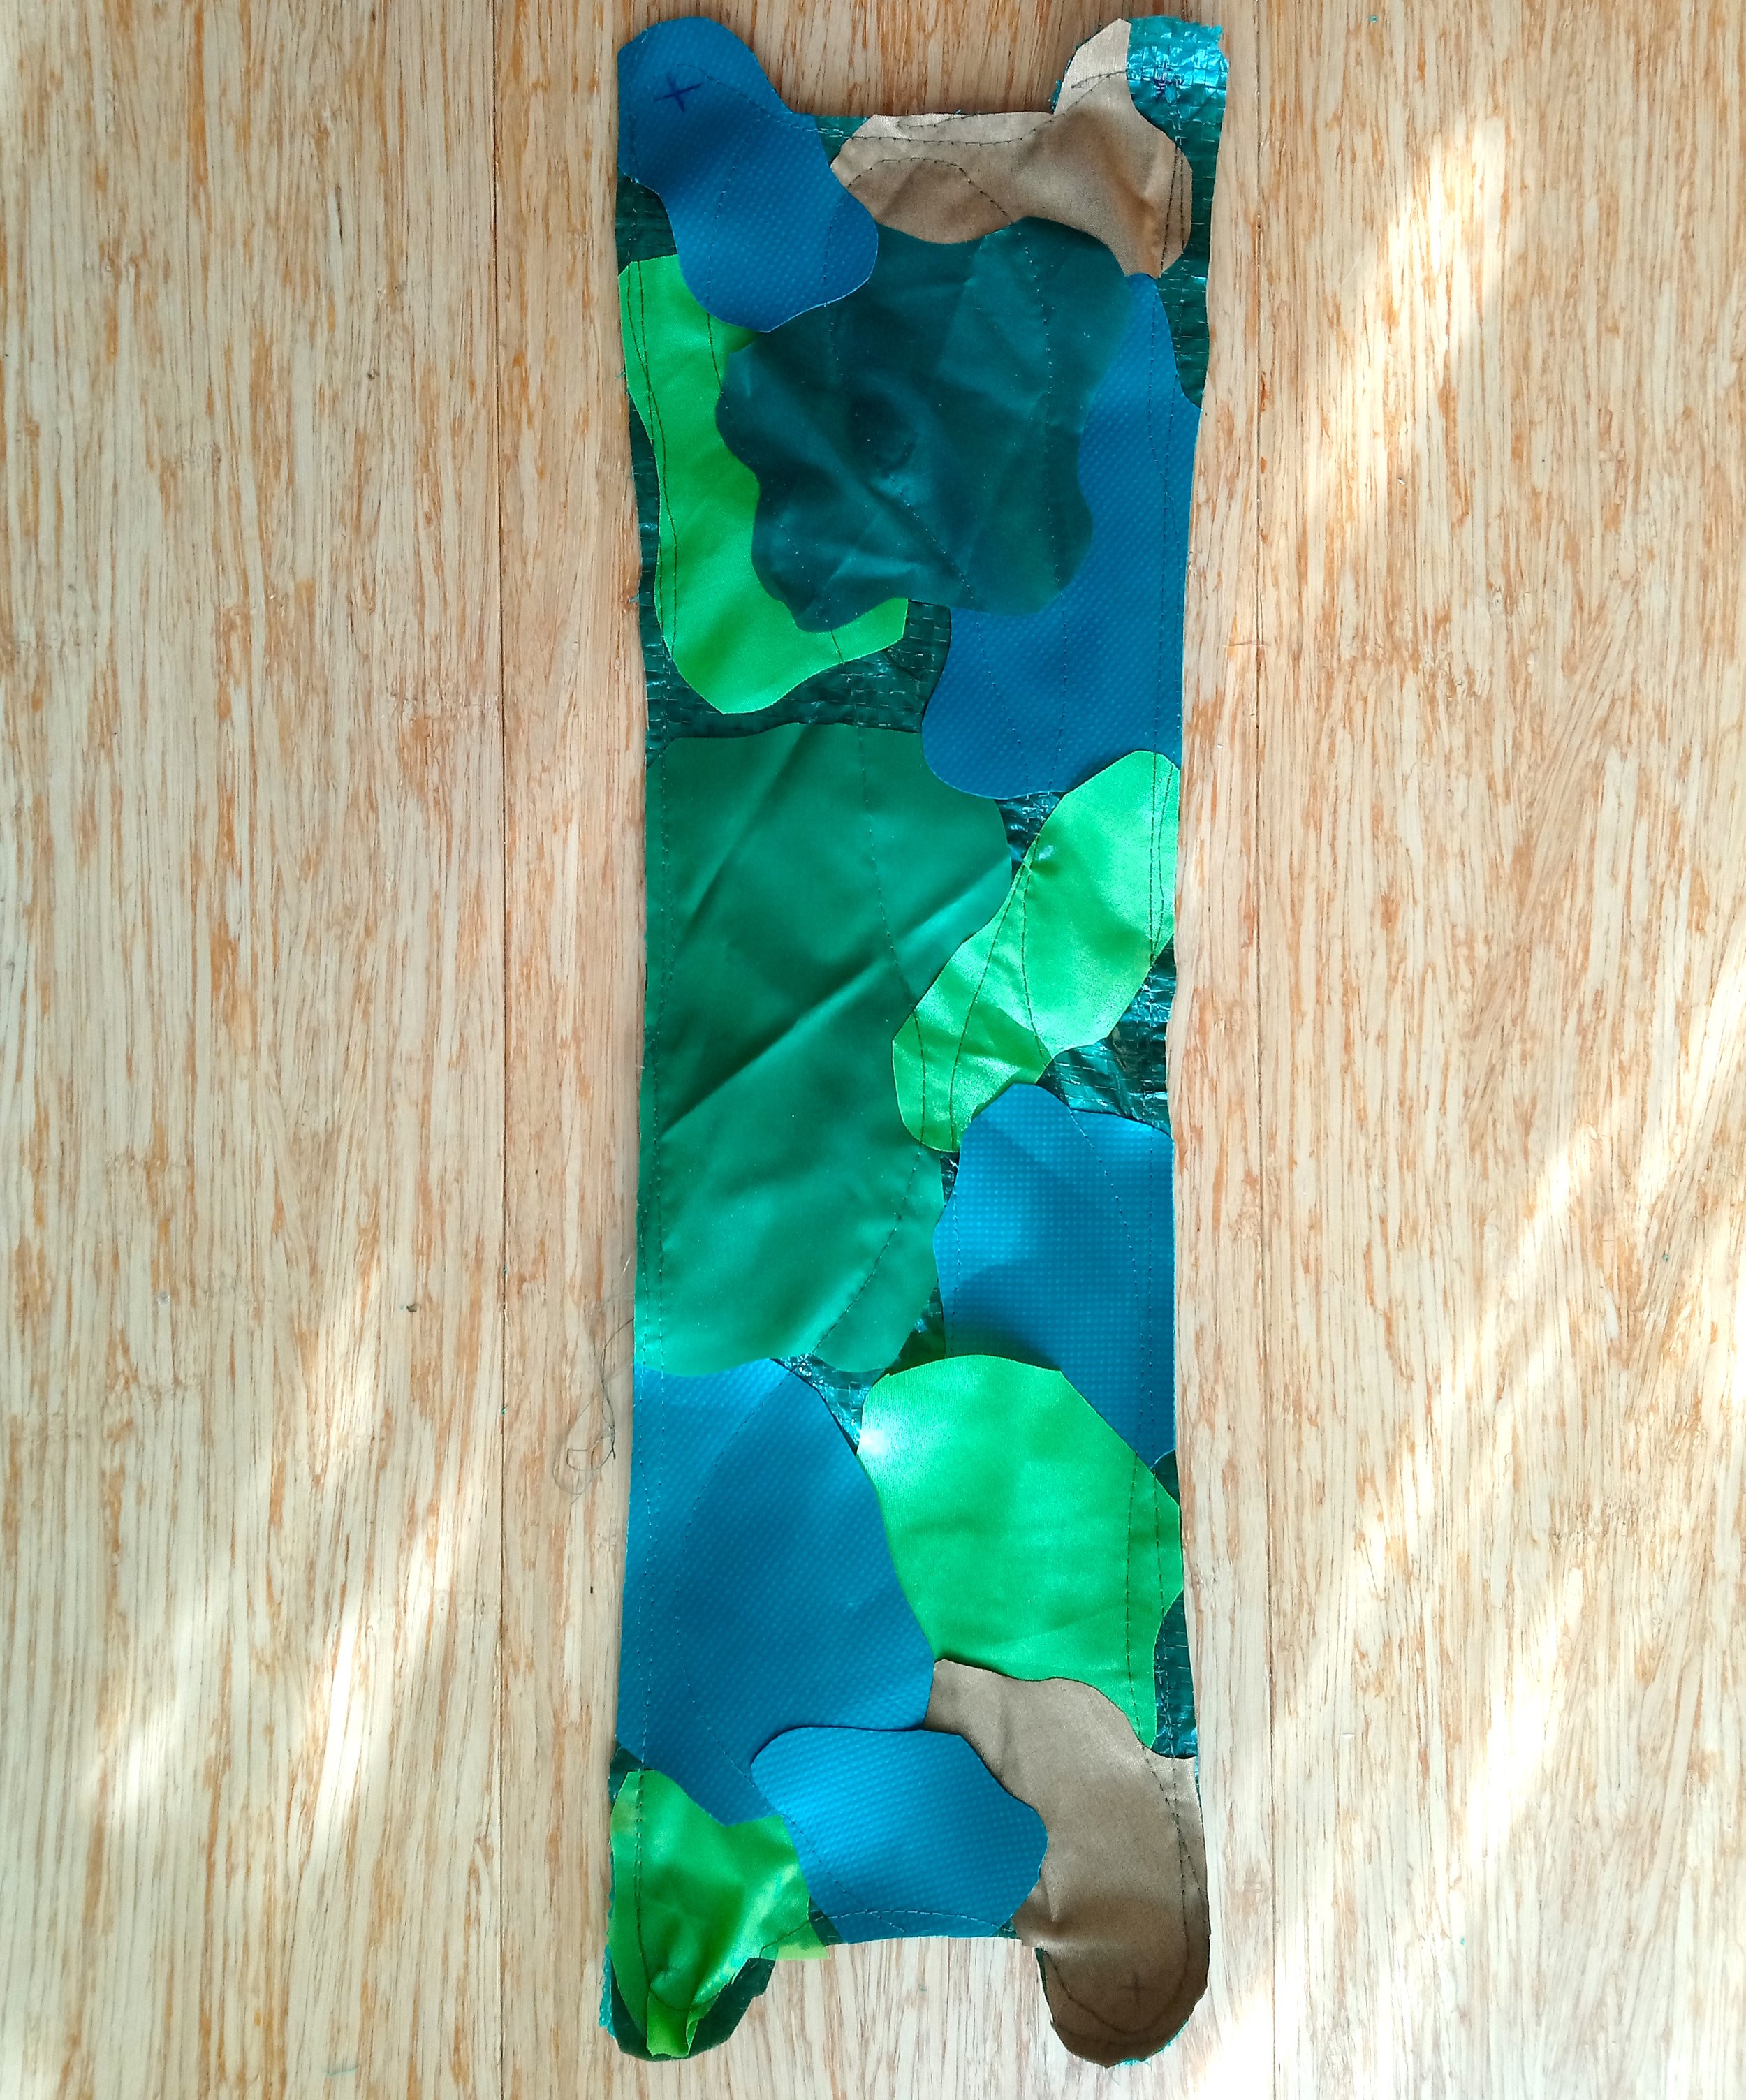
Fabric pieces sewn onto backing
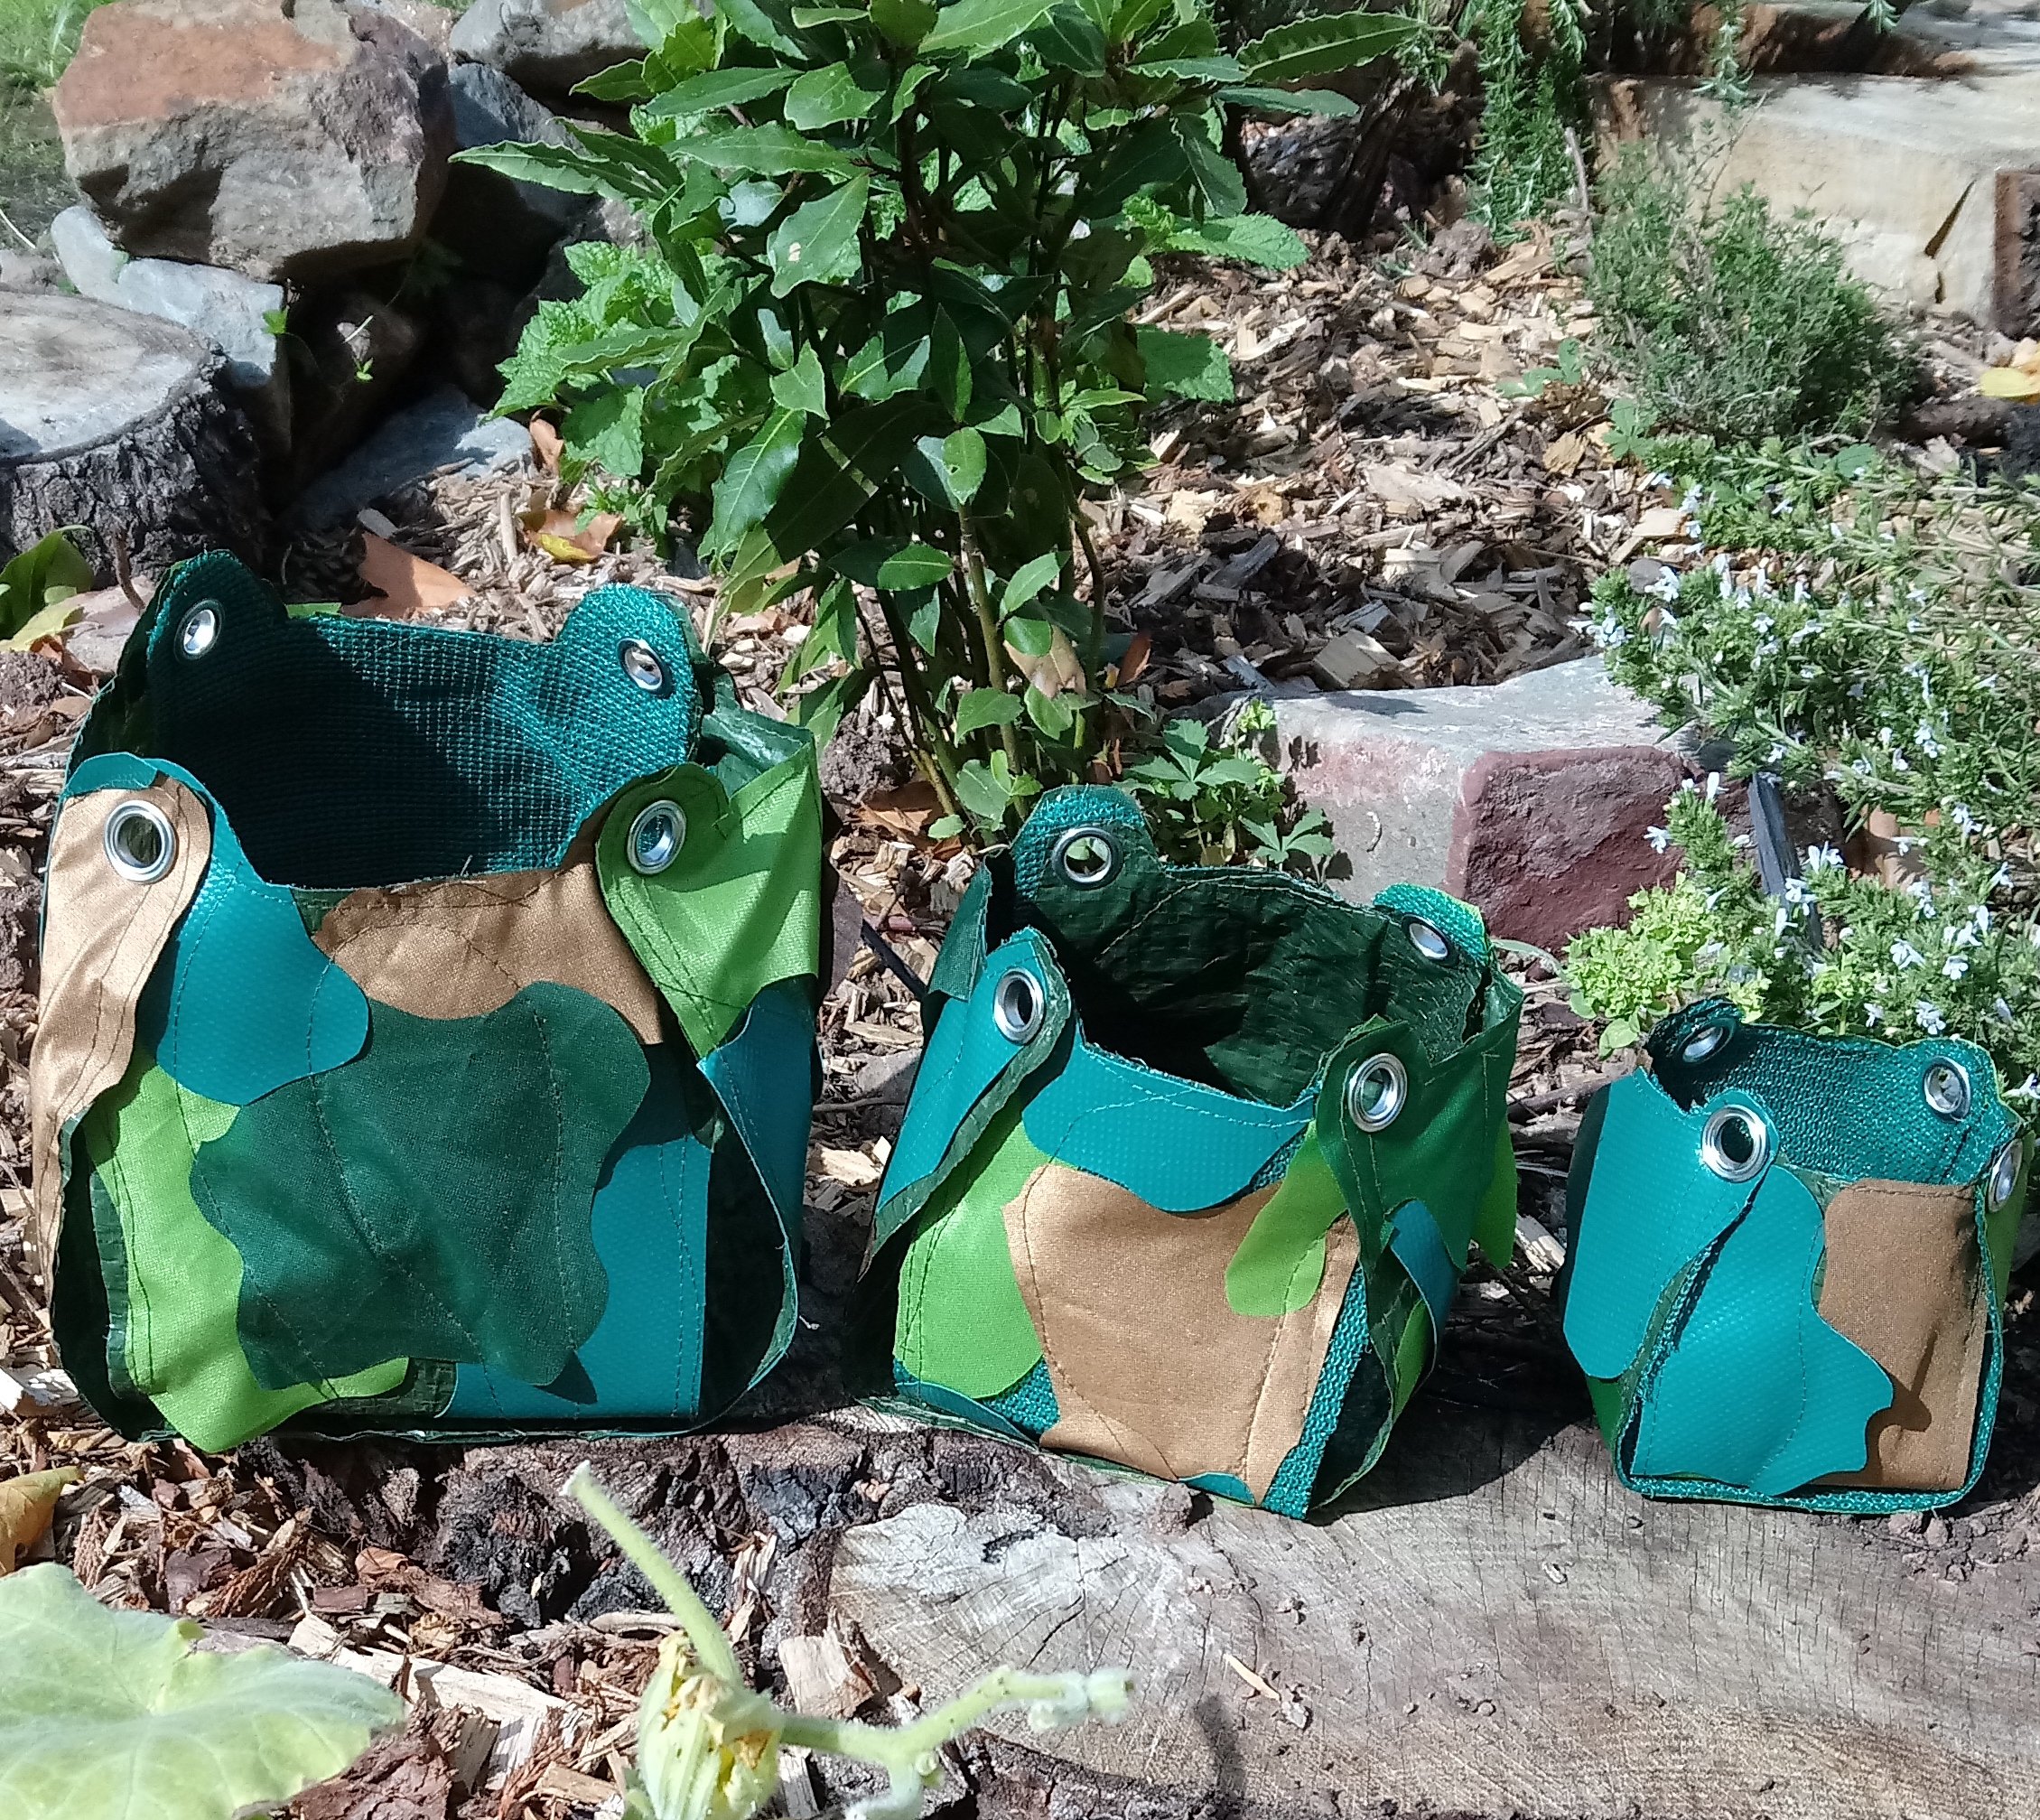
Step 4 - Place the template over the top of each piece and cut it accurately to match the template. Mark on the position for the eyelets.
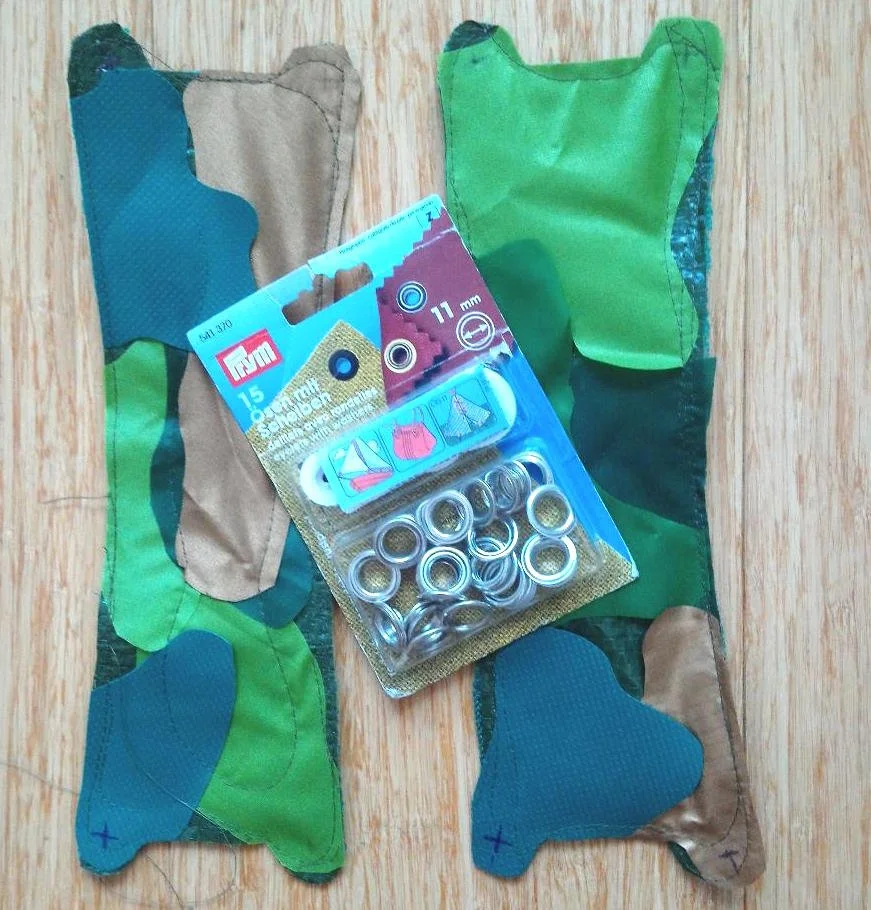
Hanging pots with eyelets
Step 5 - Sew about 7mm from the edge all around each piece. Don't worry about being too accurate, wavy lines add to the charm!
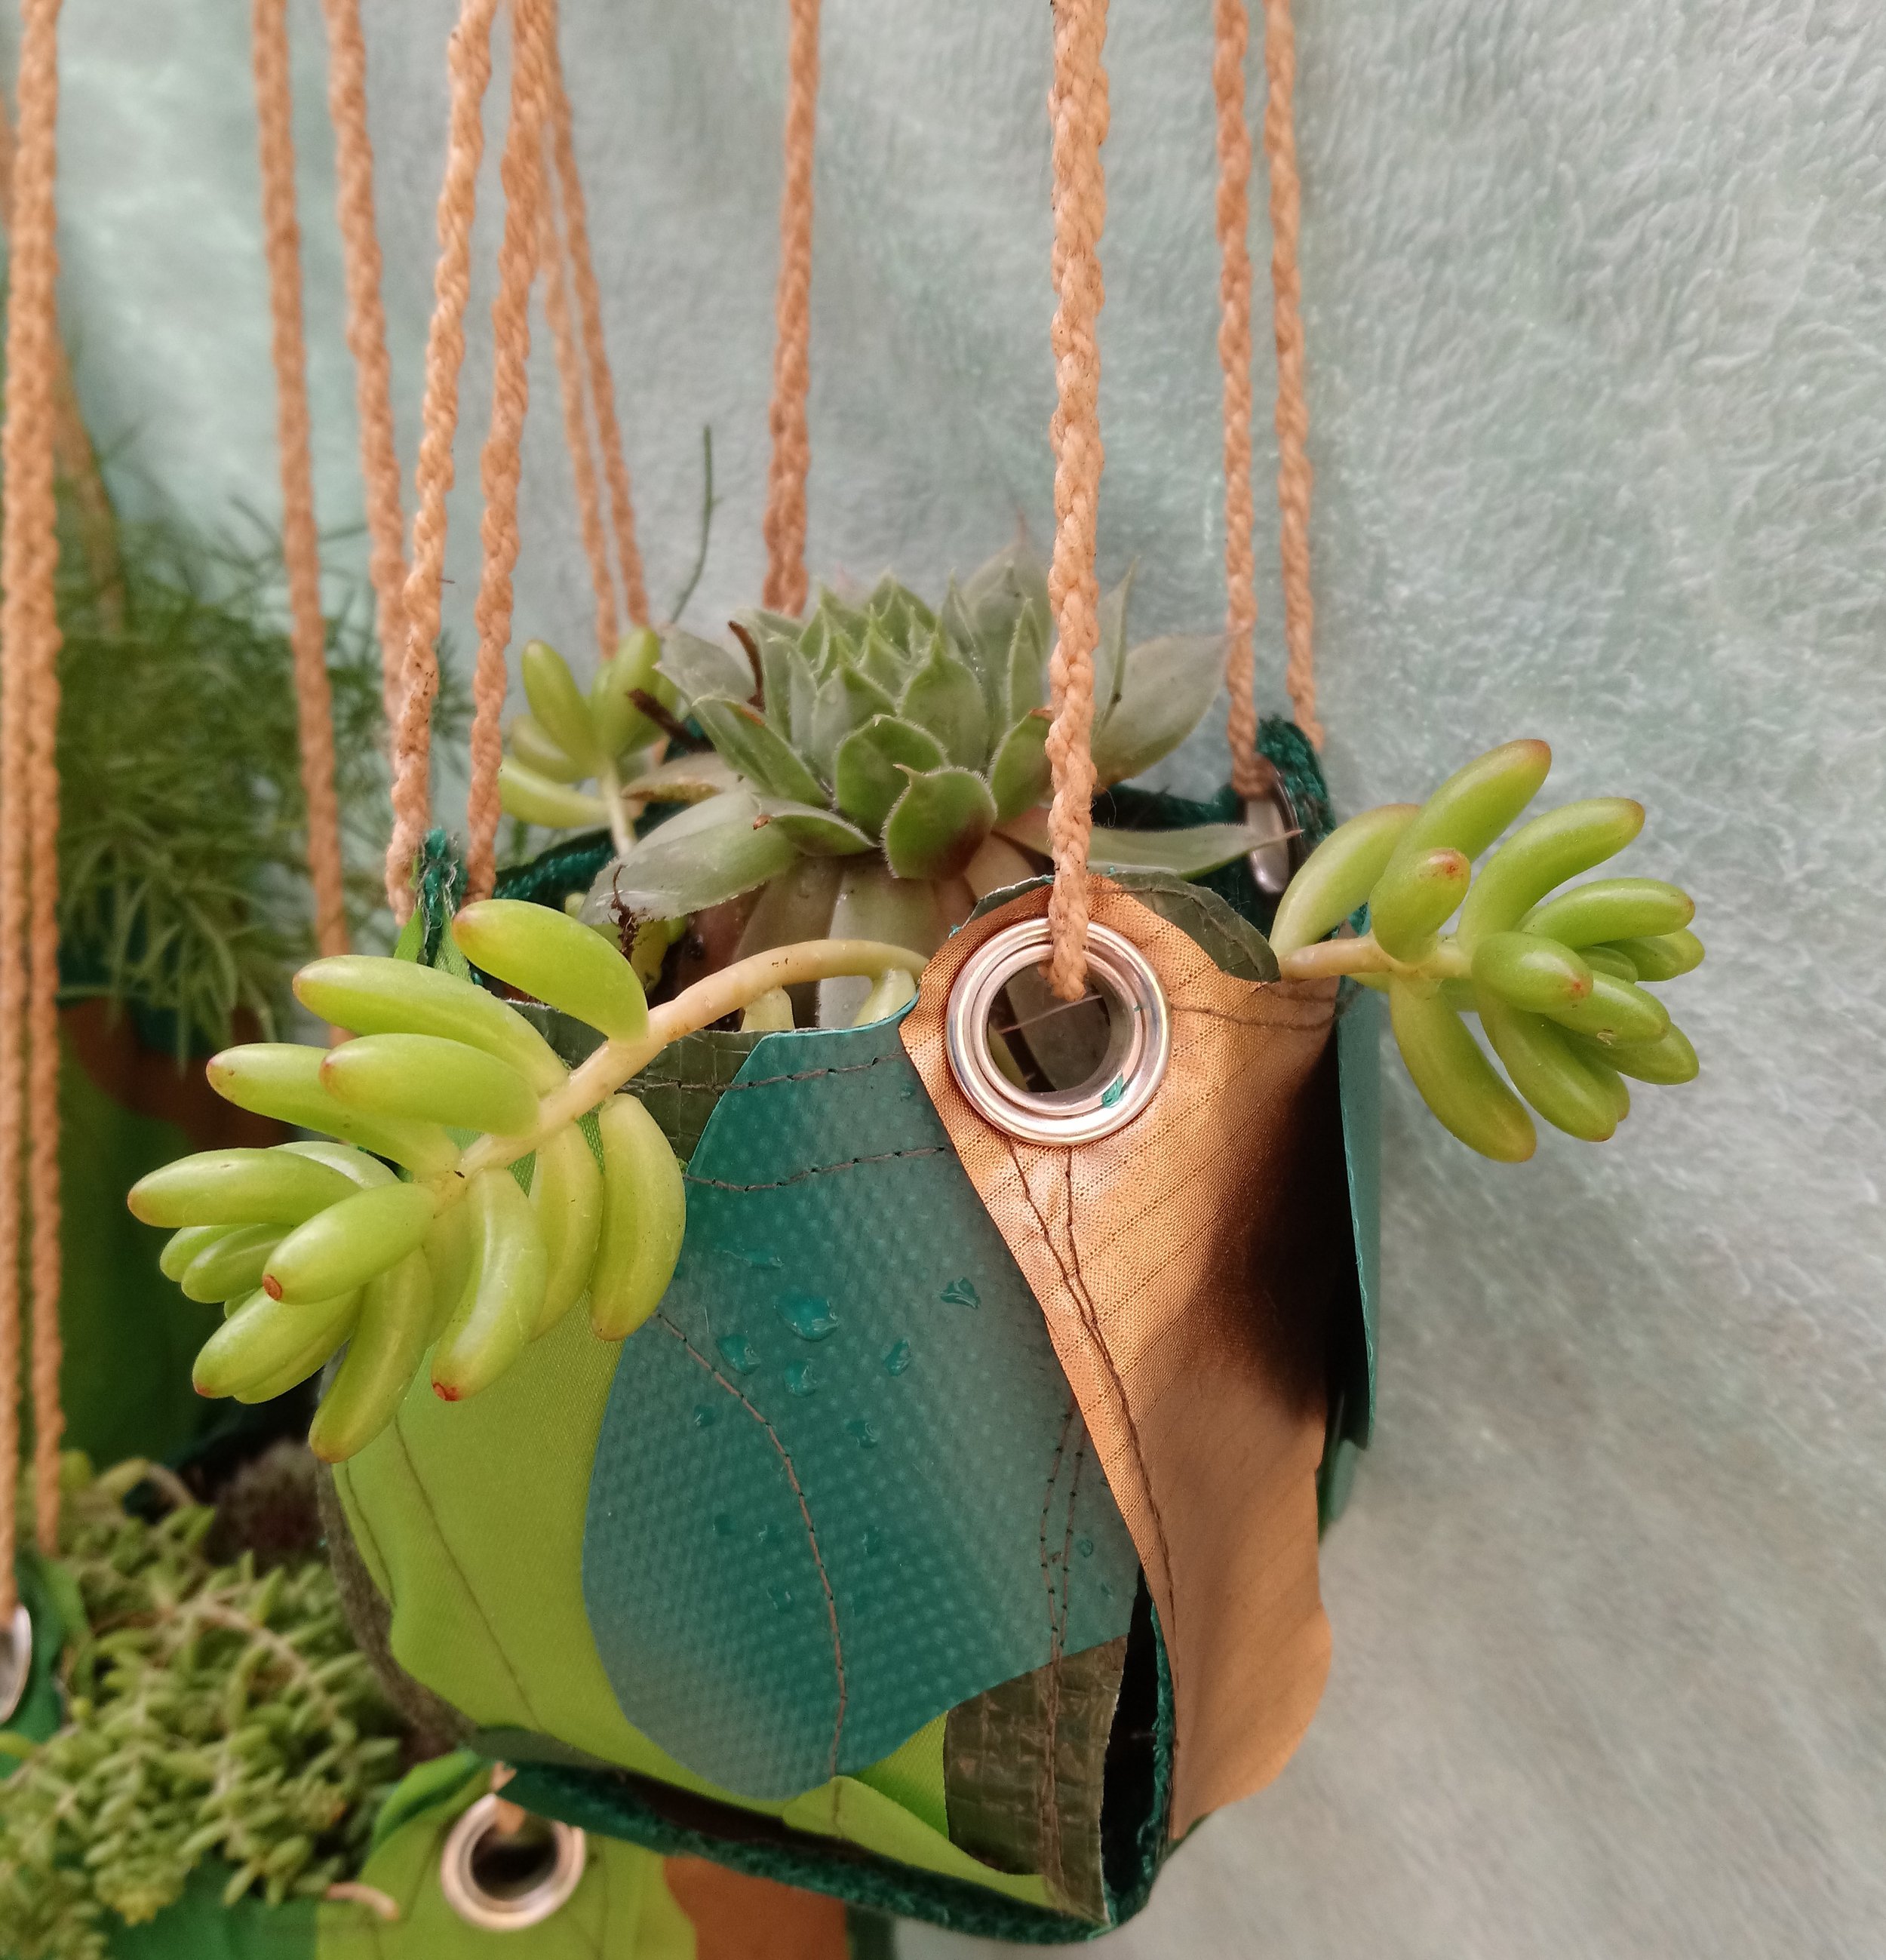
Step 6 - Follow the instructions on the Stoff & Stil website for placing the pieces together. Attach the eyelets in place, following the instructions that come with your specific eyelets. I found it best, based on experience of using these eyelets before, to not hammer too much. The eyelets are in place, however the layers of fabric can be moved to the right position which makes it much easier to form the cube shape. The eyelets act as hinges if they aren't hammered too firmly.
Step 7 - Place pots of the right size in each one. I used old plastic pots which keeps it lighter in weight than terracotta. Having a removable pot inside your sewn pot will make life easier if you need to replant it.
Step 8 - Thread twine or cord through the eyelets to your desired length and knot them together at the top.
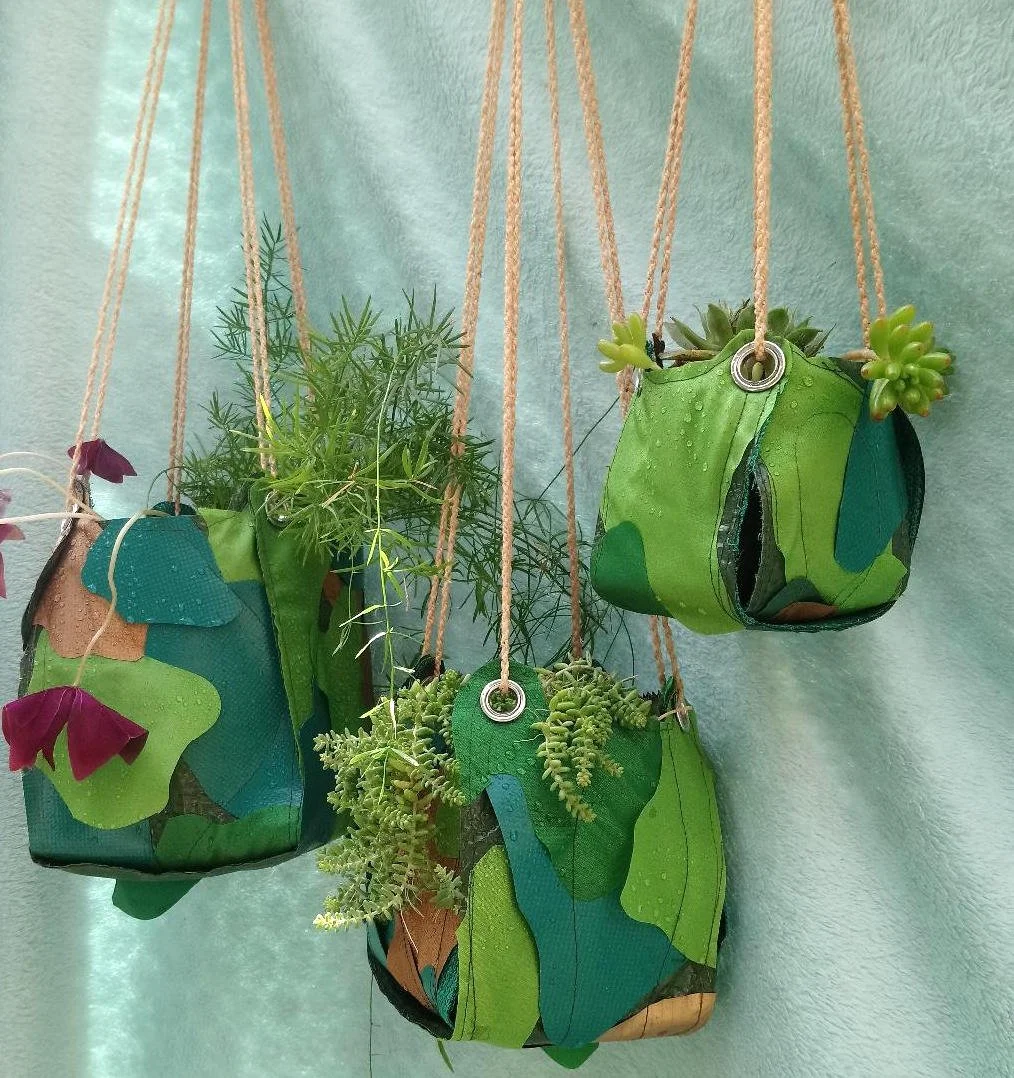
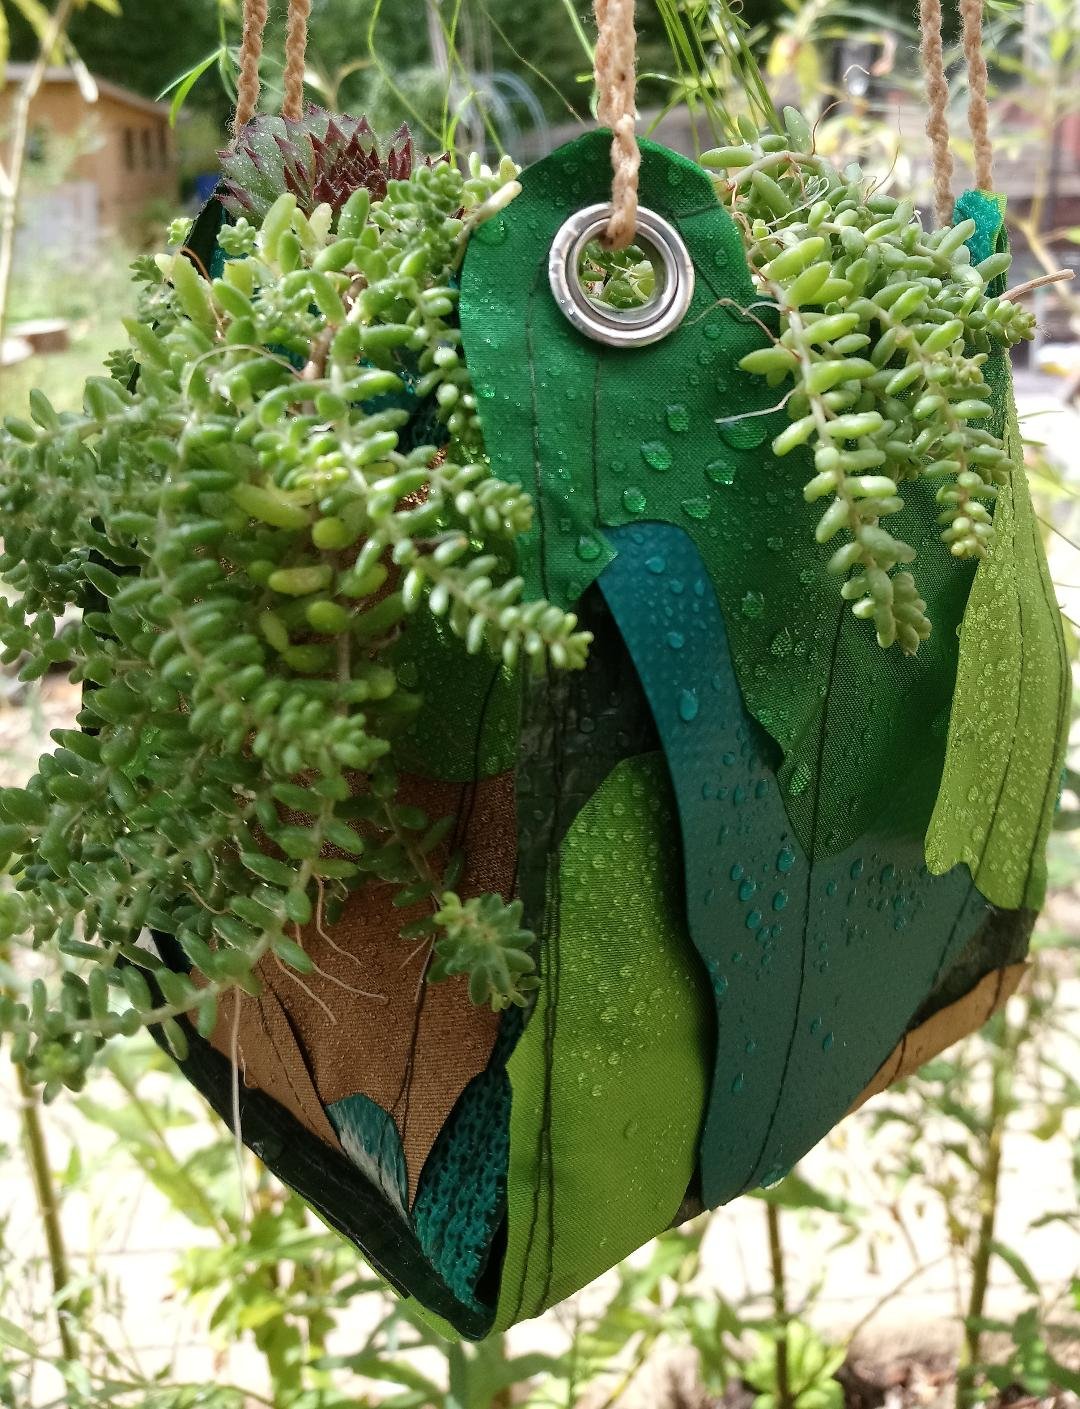
Step 9 - Sit back with a brew and enjoy the view! I've used plants I had to hand and a beautiful oxalis, kindly given to me by my neighbour. The colour palette is predominantly green. I am imagining how different it would look if I plant them with, brightly coloured, flowering plants. Maybe in a while. For now I'm enjoying the green and a pop of gorgeous purple.
Stoff & Stil free hanging pot pattern
Bye for now
Jennifer